Application Settings: Difference between revisions
| (2 intermediate revisions by the same user not shown) | |||
| Line 163: | Line 163: | ||
It is also possible to enter the costs for Energy, Gas and Water here. These values will be used when displaying reports. | It is also possible to enter the costs for Energy, Gas and Water here. These values will be used when displaying reports. | ||
For Netherlands, T1 is the night/weekend (low) rate, T2 is the day (high) rate. For Belgium this is mostly the other way around. | For Netherlands, T1 is the night/weekend (low) rate, T2 is the day (high) rate. For Belgium this is mostly the other way around. As the T1/T2 change time is automatically set by the energy supplier there no option to set it manually. | ||
===OWL 113 display mode=== | ===OWL 113 display mode=== | ||
| Line 171: | Line 171: | ||
Select a (dynamic) price device of for example [[Enever]] dynamic prices integration or Internal Meter cost settings (from the same settings page) to enable real time Energy cost calculations and reporting based on the entered prices. | Select a (dynamic) price device of for example [[Enever]] dynamic prices integration or Internal Meter cost settings (from the same settings page) to enable real time Energy cost calculations and reporting based on the entered prices. | ||
You can also create your own [https://wiki.domoticz.com/Dummy_for_virtual_Switches#Custom_Sensor dummy/virtual custom sensor] as a source for dynamic pricing and put the dynamic price in it with a (dzvents) script. Or use a Python Plugin that fills in dynamic prices in a Domoticz device that can be used as a source. | |||
For a P1 meter device you can also select for internal Low/High (T1/T2) tariff from the same settings page or a simple dynamic price. | For a P1 meter device you can also select for internal Low/High (T1/T2) tariff from the same settings page or a simple dynamic price. | ||
Latest revision as of 21:08, 25 November 2024
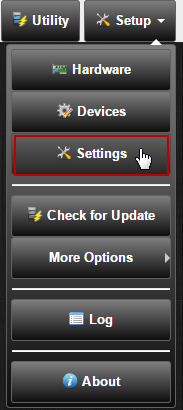
There are various application settings which can be set through the Setup | Settings menu. This page describes the various options.
System Setup
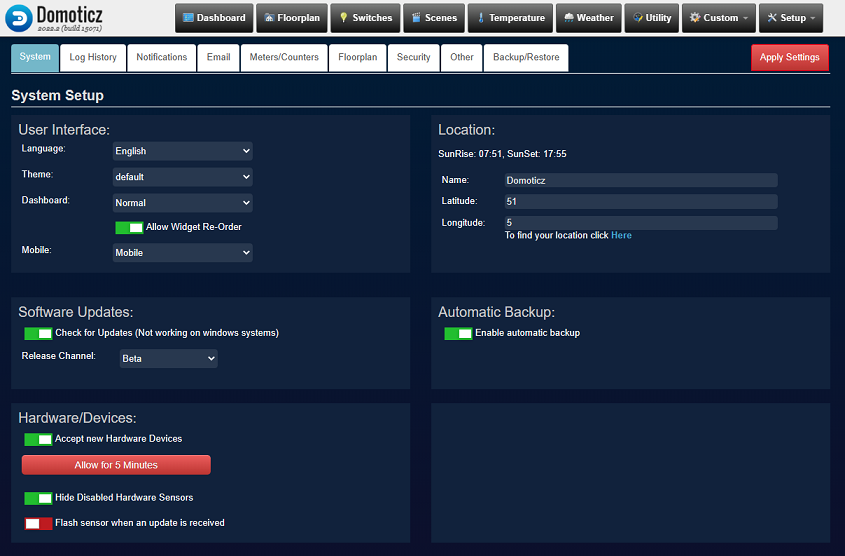
The Setting menu with various tabs allows you to enter personal parameters necessary for a better system functioning. After entering data in the fields, you have to save them by pressing the red button "Apply Settings". After this action all Password fields, which were empty at the first access, will appear with a long string of asterisks, even if they have not been used!
User Interface
Here the language and theme can be set.
The number of languages supported in Domoticz is rapidly growing. Check the forum for updates on languages.
Supported languages are:
| Arabic | Italian |
| Bulgarian | Lithuanian |
| Chinese | Macedonian |
| Czech | Norwegian |
| Danish | Polish |
| Dutch | Portuguese |
| English | Romanian |
| Finnish | Russian |
| French | Serbian |
| German | Slovak |
| Greek | Slovernian |
| Hebrew | Spanish |
| Hungarian | Swedish |
| Icelandic | Turkish |
You can select other themes to change the appearance of the user interface. See also page Customization for extra themes
Location
For control of Light/Switches based on Sunset / Sunrise timings Domoticz needs to know your location.
Location Setup is done by entering the Latitude/Longitude parameters in degrees N and E, But is it also possible to find the Latitude/Longitude for your location by pressing the "Here" link.
Dashboard mode
The default page (dashboard) supports several layout modes:
- Normal
- Compact
- Mobile1
- Floorplan
1) On mobile devices (iPhone/iPad/Android/…) the layout is always ‘Mobile’
When Widget Re-Ordering is ticked you can re-order the widgets on the dashboard
Software Updates
The Domoticz system can be updated (Raspberry Pi) via the web interface. There are two options:
- Stable versions (Recommended for production environments)
- Beta versions (Developer versions. These will appear when new features are added but may not be reliable yet.)
When a new update is available a green popup will show upon login:
Clicking "Click here" will show the list of changes so you can decide to install the update or not.
Clicking "Update Now" will update Domoticz to that latest release.

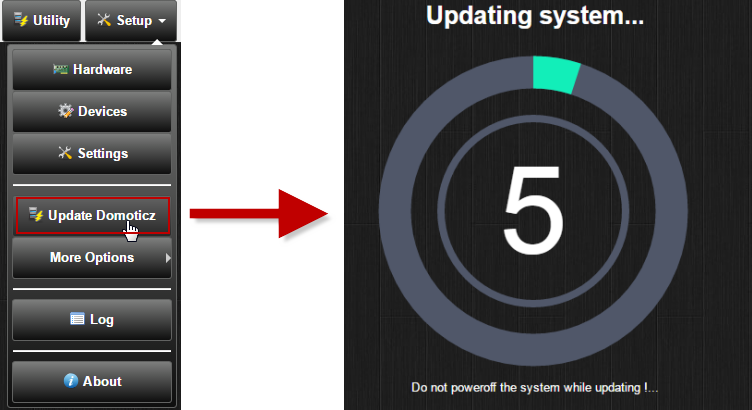
You can also check on a new version manually via the Setup|Update Domoticz button, that will instantly update your Domoticz software.
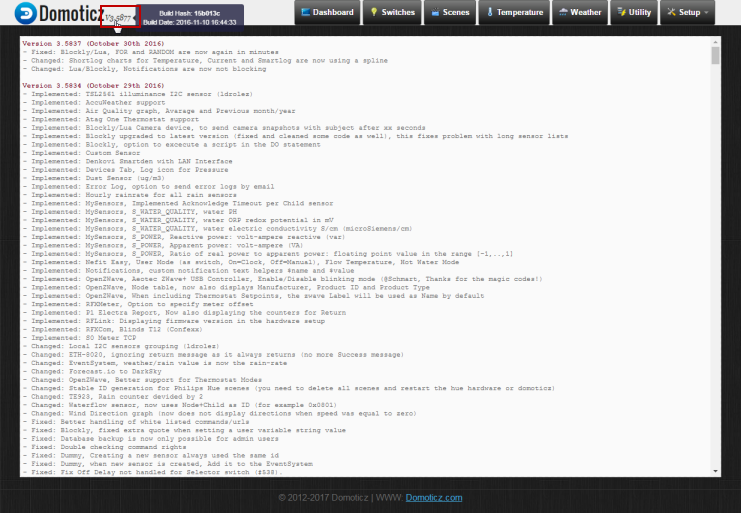
By clicking the current version number at the upper left side of every Domoticz page the list of changes for the current version will be shown.
Automatic Backup
When the Automatic Backup feature is ticked the system will create a backup every hour in the domoticz/backups/hourly/ folder, a daily backup in the domoticz/backups/daily/ folder and a monthly backup in the domoticz/backups/monthly/ folder.
In that way there will always be a recent copy of the Domoticz database available.
To manually create or restore a backup of the database see details here below at #Backup / Restore Database
Hardware/Device
Accept new Hardware Devices: By default new devices will be added and appear in the device list automatically. Untick Accept new Hardware Devices to prevent this.
Hide disabled hardware devices: When ticked disabled hardware devices will be hided in the devices list.
Flash Sensor on update: When ticked a sensor will flash when an update is received.
Log History
Light/Switches
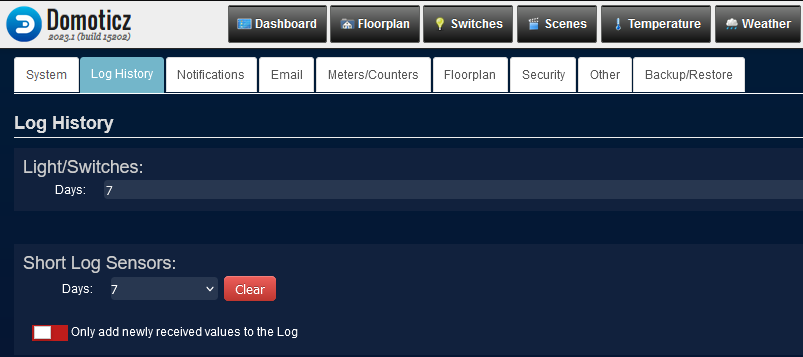
With the Light/Switches parameter you can specify the amount of Log days that a Light/Switch will hold.
Short Log Sensors
Every meter/sensor value will be logged each 5 minutes. By default 1 day of 5 minute logs will be kept and displayed in a graph when the log is requested. It is possible to enlarge this window to a maximum of 7 days, but keep in mind this will cost more hard disk space. Also when working remotely there is more data to be transferred resulting in a slower response.
Add newly received only switch
This switch sets the option to save values in the log only when really received. By default Domoticz will add the current value in the log every 5 minutes.
Note: For sensors every night at 0:00 hrs the data of the previous day will be summarized and stored in a separate table. This to minimize to database size. These table will contain all daily history over the years.
Notifications
Notifications can be send for example when a switch is pushed, electricity usage is too high,temperature to high and for many more options.
See page Devices - Edit Notifications for instruction to set Notifications on the devices.
Also with Lua and DzVents scripting you can send notifications through the Domoticz notification system.
The following notification services are supported:
- Prowl (iPhone/iPad)
- NMA (Android)
- PushBullet
- Pushsafer (iOS/Android/Windows10/Chrome/Firefox) + Image
- Pushover (Android/iOs)
- Pushalot (Windows/Windows Phone)
- Clickatell SMS
- Custom HTTP/Action
- Kodi Media Player
- Logitech Media Server
- Google Cloud Messaging
- Telegram
The services settings the notification Intervals can be set for sensors and switches.
More information can be found on the Wiki page Notifications

If you enter your email details here, you can receive notification alerts, camera screenshots and error notifications.
The screenshot shows the settings used for sending mail through a gmail account.
Extra options:
- Notification Alerts: use email as a notification channel
- Camera snapshots (only for gmail accounts): Send camera snapshot when a sensor device like a PIR has been triggered. See also page Camera_Setup#Connect_to_Switch.2FLight
- Error Notification: When an error is mentioned in the Domoticz log send an email notification.

Note: Some email providers now need a separate App password to have an external application (like Domoticz) send emails on your behalf. For Example see Gmail instructions.
Meter/Counters Setup
This section is used to tune Wind and Utility meters to your situation.
Temperature
Temperatures can be displayed in either one of the units: Celsius or Fahrenheit.
Degree Days base Temperature can be set to the temperature the yearly degree days are calculated from (normally the days below the set temperature). The degree days are shown in the Temperature device reports and can be used to compare energy consumption between years or months.
Wind Meter
Wind speeds can be displayed in either one of the units: m/s, km/h, mph or knots.
Weight
Weights can be displayed in either one of the units: kilograms or pounds.
RFXMeter / Counter Dividers
Some utility devices might use another basic scale for their meter (pulses/kWh for example).
Max Power is used for devices that have unreliable readings to filter out undesired high values. If your device can and should measure higher values please set this max power value higher.
It is also possible to enter the costs for Energy, Gas and Water here. These values will be used when displaying reports.
For Netherlands, T1 is the night/weekend (low) rate, T2 is the day (high) rate. For Belgium this is mostly the other way around. As the T1/T2 change time is automatically set by the energy supplier there no option to set it manually.
OWL 113 display mode
By default the OWL 113 displays the electrical current in Ampere. It is possible to display this in Power (Watt). For this you need to supply the normal housing voltage.
(Dynamic) Price calculation
Select a (dynamic) price device of for example Enever dynamic prices integration or Internal Meter cost settings (from the same settings page) to enable real time Energy cost calculations and reporting based on the entered prices.
You can also create your own dummy/virtual custom sensor as a source for dynamic pricing and put the dynamic price in it with a (dzvents) script. Or use a Python Plugin that fills in dynamic prices in a Domoticz device that can be used as a source.
For a P1 meter device you can also select for internal Low/High (T1/T2) tariff from the same settings page or a simple dynamic price.
Energy Dashboard
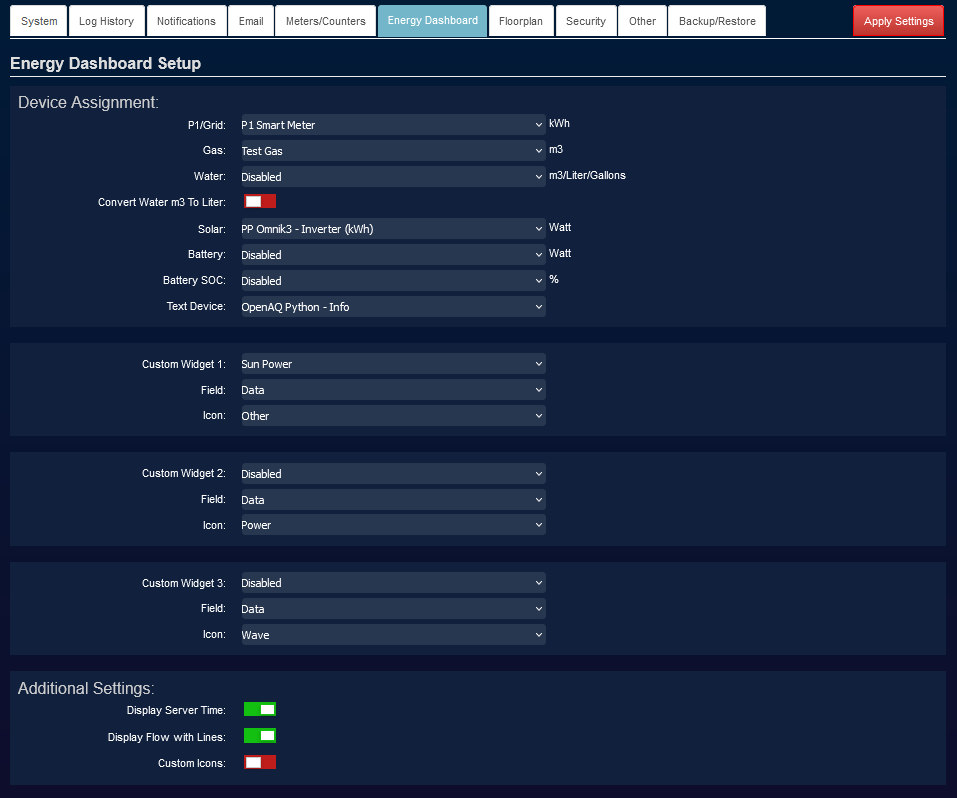
For usage see page Energy dashboard
Floorplan
This tab sets the option for the floorplans in Domoticz. For more information about setting up floorplans see page Floorplans.
Security
For Security settings see separate wiki page Security
API Protection
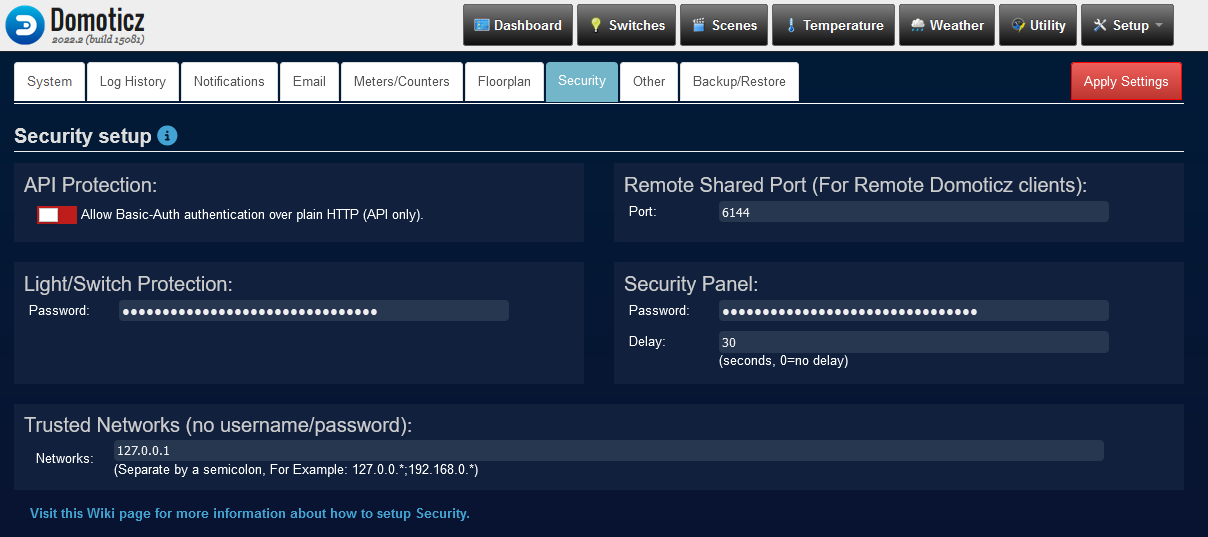
In the API Protection block, it is possible to enable Allow Basic Authentication over plain HTTP. By default, Basic-Auth credentials are only accepted when received properly encrypted using HTTPS. But sometimes, especially in local networks, the interaction between for example scripts or devices and Domoticz (API) is not secured via HTTPS and with this setting enabled Domoticz will accept Basic-Auth credentials when received over HTTP.
WARNING: Be careful with enabling this. Basic-Auth credentials are send in plaintext so can easily be captured and read when not encrypted via HTTPS. Especially if Domoticz is reachable from outside, for example via the Internet, it becomes easier for hackers to capture these credentials.
NOTE: Basic-Auth is only accepted for API-calls and not any other requests to Domoticz! This means only calls to '/json.htm' (the current API entrypoint) will look for credentials provided via Basic-Auth.
NOTE: API URLs with username and password as parameters (eg https://IP:PORT/json.htm?username=userBASE64&password=PWDBASE64& ) are not supported anymore!
Use https://username:password@IP:PORT/json.htm instead. Sending the User/Pass using Basic-Auth is actually safer then using the URL parameters as the user/password is not send as is, but (base64) encoded and not as part of the URL but in a separate header. And when done over HTTPS, everything is encrypted as well.
NOTE: API URLs with user/password normally only work with HTTPS when tested on browsers. Current browsers already remove the user/password section from the URL when used over HTTP. Use tools like 'curl' or 'postman' to test with HTTP. For external access it is advised to use HTTPS as it brings an extra encryption layer. See wiki Native HTTPS / SSL support and Native secure access with Lets Encrypt.
Trusted Networks
By default Domoticz can only be accessed by providing valid credentials. But in some circumstances that might not be possible, for example when a certain device can send data to Domoticz but cannot provide credentials.
It is possible to receive requests from certain IP addresses that should be considered as Trusted. When a request comes in without any credentials, Domoticz will look at the IP-address of the request and check if it falls within the given 'Trusted Network'.
If the request comes from within a Trusted network and does not have any credentials provided, Domoticz will look for the first 'admin'-user it has in its Users list, and assumes the identity of that user. Now the request is processed further as if coming from this admin user.
NOTE: If a request comes in that provides credentials in some way, these credentials will be validated and accepted OR rejected regardless whether the IP-address comes from a Trusted network or not!
NOTE: For setups where a (reverse) Proxy is used, the IP address of that Proxy should be in the list of Trusted Networks. If that is the case, Domoticz will trust the Proxy Header information from the Proxy to determine the origin IP address of the request. This IP address is than used as the real source of the request, meaning that Domoticz will look at that address to determine how to handle the request, for example if it originates from the Trusted network or not. More info can be found in the section about Proxies.
Pro-TIP: A secure Domoticz setup should have no need for any Trusted networks. Only the IP-address(es) of trusted Proxy server(s) should be in the list!
Proxy servers
Special attention is required when using Domoticz behind a proxy server.
It does make sense to run Domoticz behind a Proxy for example to perform SSL offloading and/or safely route internet traffic to Domoticz when a connecting to the Internet is wanted.
Without any special action, Domoticz will see every request coming from the IP-address of the Proxy server and will treat that IP-address as the origin address. Although the request from the Proxy might contain information telling that a Proxy is involved, this information is not used by Domoticz as any request could be extended to contain such information that states it is coming from a Proxy.
Before Domoticz looks at this Proxy information, the IP-address of the Proxy should be specified in the Trusted Network list. Once the IP-address is in this list, Domoticz will use Proxy information in any request coming from such a trusted IP-address.
Domoticz honours the following Proxy-headers (in order):
- Forwarded
- X-Forwarder-For
- X-Real-IP
If it finds one of these headers, it will process them and use that information to further handle the request.
NOTE: It will only process 1 header and that is the first it will find (see above order). So when 2 different headers are provided, the 2nd will be ignored. Even when the 2nd could be more relevant, but Domoticz has no way to determine if one header is more relevant or accurate than another.
See page WebServer Proxy for example configuration on Apache, Nginx or Synology NAS.
Light/Switch Protection
If you want that an On/Off device be "protected" (see page Managing Devices), you can create a password that will be required by the system before executing commands, provided that you have ticked the "protected" box during the device editing phase.
Security Panel
The system has a security panel to specify if you are home/home-armed/away. You can use this as an alarm system. Here you can set the security code to change the arming state.
When you press arm on the security panel the default delay is set on 30 seconds before the alarm system becomes active. This can be modified with the setting Delay.
When the password has been entered in the password field and saved (apply button) an internal Domoticz device "Domoticz Security Panel" will be created and can be added as switch. To be sure also try to Arm/Disarm the security panel (Menu Settings - More Options - Security panel)
After this the security panel can be renamed, activated and used in scripting.
For information how to setup an alarm system with existing sensor see page Alarm Setup
If you wish to share your sensors to other users, you can specify the remote port that Domoticz will listen on for remote connections. Consult your router for setting up a firewall/NAT rule to this port or check this howto.
Other Settings

This section contains various other settings.
Random Timer
This specifies the maximum time spread that randomness will provide when the randomness check box is selected within the Timers area of Switches and Scenes.
Example usage:
Select a spread time of 10 minutes, then enable the randomness check box within the Timers area of a particular Switch.
Set the Switch to turn on at 22:00 each day.
The end result will be that the Switch will turn on sometimes at 21:50, sometimes at 22:10, and at various other random times between these values. This is useful if you wish to make it appear that you are at home, and aren't actually automating the control of a Switch.
Sensor Timeout
If the device is not seen for a long time (timed out), the highlight color will be Red. Set timeout time it in minutes
This setting only checks Sensors (temperature, humidity, lux etc), not Switches/Lights.
Also a notification can be set on sensors through the device notification button.
Battery Low Level
Here you can set the level at which you get a notification that the battery level of the device is low. 0 = no notification.
A device widget will become yellow to indicate it is below set battery level.
Timer Plan
With timer plans you can setup a specific set of timed devices for example: Setup a lighting schedule when on Holidays.
With this setting you set the active timer plan. For more information go to page Timer Plan
Doorbell Command
Info needed!
Seems to be an old setting not used anymore in current version (V2020.1)
Raspberry Pi Camera Parameters
In this box special parameters to be used with the raspistill module for the RaspiCam can be added. These parameters are detailed here.
UVC Parameters
Parameters used by USB Camera Hardware that is using uvccapture command. see this link for parameters help.
EventSystem (Lua/Blockly/Scripts)
Switch the Events system (scripting in Lua, DzVents, Blockly or Python) On (default) or Off.
When the Log 'event script triggers' checkbox is checked, the 'event script triggers' will be logged which was the default behavior. This logging of the 'event script triggers' can be disabled by unchecking the checkbox.
When the Log 'URL calls with full URL path' checkbox is checked, the URL calls of the eventsystem will be logged referring the full path which was the default behavior. This logging of the 'URL calls with full URL path' can be disabled by unchecking the checkbox. It will then only log that an URL is opened.
dzVents
Enable/Disable the dzVents eventsystem and set the logging.
when enabling dzVents make sure that in the Security section in the settings (Setup > Settings > Security > Trusted Networks (no username/password) you allow 127.0.0.1 (and / or ::1 when using IPv6 ) to not need a password. dzVents does use this port to get the location settings and to send certain commands to Domoticz. Finally make sure you have set your current location in Setup > Settings > System > Location, otherwise there is no way to determine nighttime/daytime state.
Backup / Restore Database
Here you can create a manual backup or do a manual restore of your Domoticz database. Please note a automatic backup is available under system settings #Automatic Backup.

