Dummy for virtual Switches
Another special hardware type is the Dummy Hardware. As the name implies this hardware does not communicate with the outside world. It's purpose is to be a placeholder for virtual switches and virtual sensors which can be used as variables in events and scripts. New virtual switches can be added in the switches tab (Add manual light/switch). New virtual sensors (and switches) can be created from the hardware overview list.
Add Dummy to hardware list
- Goto Setup - Hardware
- Type a name for the new hardware group Virtual Dummies (in below example X10)
- Select from Type : Dummy (Does nothing, use for Virtual switches only)
- Click on Add
Create Virtual Switches and Sensors
Goto Setup - Hardware and click on the Create Virtual Sensor button of hardware type Dummy (Does nothing, use for Virtual switches only)
Type name of new Sensor or switch and select Sensor type. Click on Add The device is automatically added as an active device to the device list and can be found in the appropiate tab Switches/Temperature/Utility.
The type and subtypes of switches and sensors you can create are basicly described on the wiki page Domoticz API/JSON URL's
If you created a switch you can go to the switch tab and modify the type of switch (Edit Button on Widget). See a description of the switch subtypes below.
Virtual Device Types
Note: Work in progress, not fully up to date!
Switches
There are lot of type of switches each with various functions and or settings.
In general virtual switches can control hardware devices by triggering action scripts (http, python, bash) or the state changes (On, Off, Color, Mode etc) are picked up by Blockly, Lua -, dzVents scripts or MQTT (if enabled).
Switch Subtypes
The definition of a switch can be changed after creation by the Dummy Hardware.
Click on the Edit button and change the switch type:
The following type are possible:
- Blinds (2 buttons, Open/Close) see special page for Blinds
- Blinds + Stop (3 buttons and slider) see special page for Blinds
Blinds Inverted (2 buttons, Open/Close)see special page for Blinds- Blinds percentage (2 buttons and slider, Open/Close) see special page for Blinds
Blinds percentage Inverted (2 buttons and slider, Open/Close)see special page for Blinds- Contact (for alarm contacts open/close). Cannot be switched from User interface, only by Blockly, Lua or dzVents scripts or MQTT (if enabled) or Domoticz API/JSON URL's
- Dimmer (for giving a level 0-100% to a device)
- Door Contact (Open/Close and On and Off delay). Cannot be switched from User interface, only by Blockly, Lua or dzVents scripts or MQTT (if enabled) or Domoticz API/JSON URL's
- Door Lock (to unlock a door and switch off with a delay. Also Inverted version.
- Doorbell
- Dusk Sensor (On= Dark environment, Moon icon, Off = Light environment, Sun icon). Cannot be switched from User interface, only by Blockly, Lua or dzVents scripts or MQTT (if enabled) or Domoticz API/JSON URL's
- Media Player
- Motion Sensor. Cannot be switched from User interface, only by Blockly, Lua or dzVents scripts or MQTT (if enabled) or Domoticz API/JSON URL's
- On/Off
- Push Off Button
- Push On Button
- Selector (See Selector Switch)
- Smoke detector. Has Reset mode.
- Venetian Blinds EU (3 buttons, Open/Close and Stop) see special page for Blinds
- Venetian Blinds US (3 buttons, Open/Close and Stop) see special page for Blinds
- X10 Siren
Color Light switches
- RGB Switch (RGB Colors, Level, Dimmer, ON/Off)
- RGBW Switch: RGB dimmer with white modes
- RGBWW Switch: RGB dimmer with white modes and adjustable white color temperature
- RGBWZ Switch: Dimmer with separate adjustable levels for RGB and White leds
- RGBWWZ Switch: Adjustable levels for RGB and White, adjustable white color temperature
- WW Switch: Dimmer with adjustable white color temperature
Selector Switch
A selector switch is a switch with multiple values (Off/Level1/level2/level3) that can be defined as needed (max 10 levels).
At each level a script command can be attached.
If you use the Off value be sure it is written as "Off".
The Off state will only be shown when set manually (or by a script). When clicked on the Icon the device is switched off but will remember its selector state when switched on again.
You can decide to hide the Off selector level in the switch options (Edit button)
Tip: Use special characters in level name to show icons instead of names.
In the switch below the following characters are used
10: ▲ => UP
20: ◼ => STOP
30: ▼ => DOWN
40: A => Auto
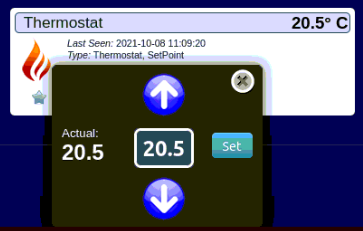
Thermostat Setpoint
With this special switch a Thermostat/Setpoint device can be set.
This device is shown on the Utility page
From version 2024.1 Thermostat Setpoint is changed into a general Setpoint device
Standard a Thermostat device is created but you can change it into any setpoint device:
- user defined Unit like RPM/Watt/°C etc (default °C)
- step size (default 0.5)
- minimum value (default -200)
- maximum value (default 200)
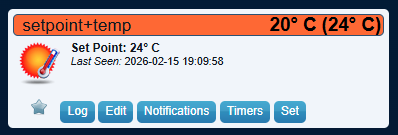
Thermostat + Temp
Beta 2025.2
This device is shown on the Temparature page.
Thermostat + Temp+Hum
Beta 2025.2
This device is shown on the Temparature page.
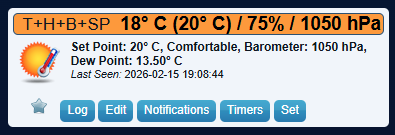
Thermostat + Temp+Hum+Baro
Beta 2025.2
This device is shown on the Temparature page.
Sensors
Add measurement values to Virtual Sensors
Sensors make only sense if they have values to display and monitor. This can be done with Scripts, Domoticz API/JSON URL's and/or MQTT (if enabled)
See for example page Virtual meter
Air quality
Device showing the CO2 PPM values.
Location: Utility tab.
History report: No
Values
- PPM = CO2-concentration
airquality < 700 status text: "Excellent"
airquality < 900 status text: "Good"
airquality < 1100 status text:"Fair"
airquality < 1600 status text: "Mediocre"
airquality >= 1600 status text: "Bad"
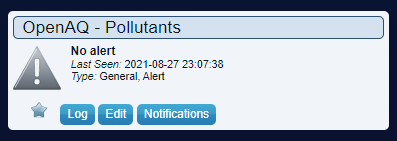
Alert sensor
Device that can show an alert level (0-4) in colors.
Location: Utility tab.
History report: No
Type: General, Alert
Values
- Level = (0=gray, 1=green, 2=yellow, 3=orange, 4=red)
- TEXT = Text you want to display
Ampere 1 (and 3) Phase
This device shows the current of 1 phase or, if selected the 3 phase device, the 3 Phase values.
Location: Utility tab.
History report: Yes
Values
- Ampere_1 = Ampere value Phase 1
- Ampere_2 = Ampere value Phase 2
- Ampere_3 = Ampere value Phase 3
Barometer
A Barometer device showing the pressure and a forecast
Location: Weather tab
History report: Yes
Values
- BAR = Barometric pressure
- BAR_FOR = Barometer forecast
Barometer forecast can be one of:
0 = Stable
1 = Sunny
2 = Cloudy
3 = Unstable
4 = Thunderstorm
5 = Unknown
6 = Cloudy/Rain
Counter
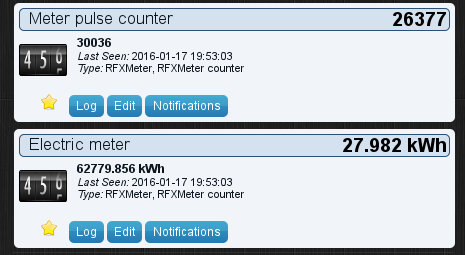
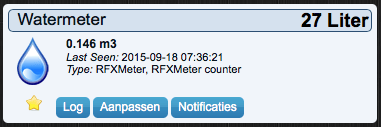
Device showing the results of a total counter today and total. It can be set to Volume (Gas or Water), Energy or Counter (custom).
Location: Utility tab.
History report: Yes
Type: RFXMeter, RFXMeter Counter.
Values
- COUNTER = Integer of the overall total Volume, Energy or custom Counter.
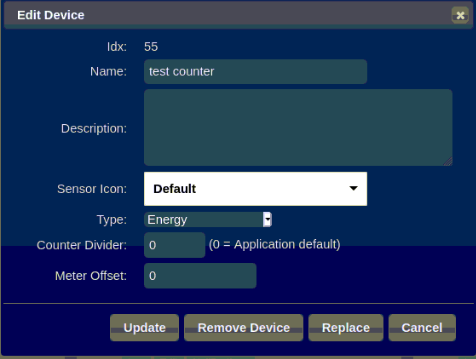
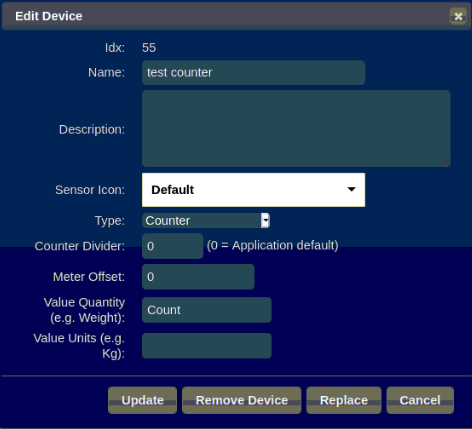
When there is a counter created, there is a possibility to change the units by clicking on "Edit" on the widget at the utility tab.
Type:
- Energy (kWh)
- Gas (m3)
- Water (m3)
- Counter, extra custom unit fields:
- Value Quantity (eg Weight, Time on)
- Value Units (eg kg, min)
- Energy Generated (kWh)
- Time (min?) usage of this type is unkown and seems obsolete. Use Counter with custom time unit as desired (eg Sec, min, hrs)
Counter divider:
- The counter will be treated with the divider which is defined in the parameters in the application settings when counter divider setting is 0. For example if the counter is set to "Water" and the value is passed as liters, the divider must set to 1000 (as the unit is m3). As the counter device only accepts integers as input it is also a way to show fractioned values. Like water meter is sending liters (eg 12538791) use the divider of 1000 to show 12538,791 m3 in the widget. If no divider is necessary use the divider value of 1 (and not 0).
Meter Offset:
- There is an offset value that can be set to be added to the measured value.
The device widget displays 2 values:
- The status is the overall total volume (or counter).
- The volume (or counter) of the day (in the top right corner).
The today's volume (or counter) is calculated from the total volume (or counter).
Counter Incremental
Device showing the results of a counter today and total. It can be set to Volume (Gas or Water), Energy (Electricity) or Counter (custom).
The device displays 2 values:
- The status is the overall total volume (or counter). This is the total of received delta updates. If for some reason the updates (by script, http json calls etc) are missed they are not added afterwards.
- The calculated volume (or counter) of the day (in the top right corner).
Location: Utility tab.
History report: Yes
Type: General Counter Incremental
Values
- COUNTER integer of delta value related to the last sent counter update
When there is a counter created, there is a possibility to change the units by clicking on "Edit" on the widget at the utility tab.
- Energy (kWh)
- Gas (m3)
- Water (m3)
- Counter, extra custom unit fields:
- Value Quantity (eg Weight)
- Value Units (eg kg)
- Energy Generated (kWh)
- Time (min?) usage of this type is unkown and seems obsolete. Use Counter with custom time unit as desired (eg Sec, min, hrs)
The counter will be treated with the divider which is defined in the parameters in the application settings. For example if the counter is set to "Water" and the value is passed as liters, the divider must set to 1000 (as the unit is m3).
The today's volume (or counter) is calculated from the total volume (or counter).
To reset an incremental counter, set the svalue to a negative integer equal to the current total of the counter.
Custom Sensor
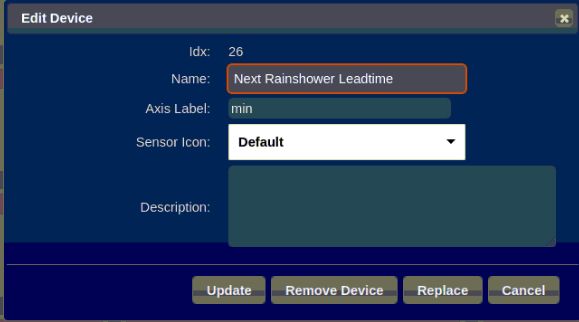
Device showing the results of custom value. It can be set to any Unit of Measure during the creation or edit of the device in field Axis Label.
There is no history report function available.
Location: Utility tab
History report: No
Values
- VALUE = Value (like 12.345)
Axis Label
- Unit of measure to be used, free text value (eg min, Solar Energy, hour etc)
Distance sensor
Device that shows the distance in centimeters or inches.
Location: Utility tab
History report: No
Values
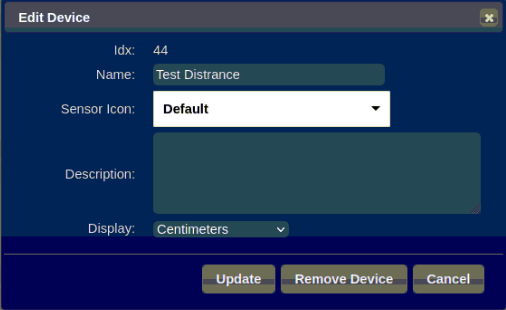
- DISTANCE = distance in cm or inches, can be in decimals. For example 12.6
Display
- Unit of measure, centimeters or inches.
Electricity (instant and counter)
Device that shows the current power usage (Watt) and the cumulative energy (kWh). It can also be set to Return to measure for example your Solar panels.
Domoticz will calculate the today values based on the delta's in the total cumulative energy counter.
Location: Utility tab.
History report: Yes
Type: General, kWh
Values
- POWER = current power (Watt)
- ENERGY = total (lifetime) cumulative energy counter in Watt-hours (Wh).
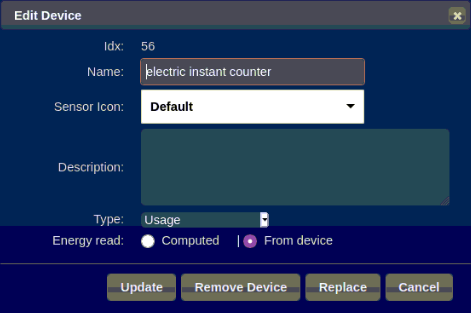
Type:
- Usage, measures the electricity usage
- Return, Measures electricity return devices (eg solar panels)
Energy Read:
- Default: From Device. If the device is not able to send the ENERGY counter values you choose "Energy read : Computed". This will ignore ENERGY counter values and Domoticz will calculate the Energy (kWh) internally based on the (previous/current) POWER (Watt) values. By design this is less accurate then using the ENERGY counter when using them "from Device".
Gas
Device that shows the current gas usage today and the cumulative total gas usage (counter)
Location: Utility tab.
History report: Yes
Type: P1 Smart Meter, Gas
Values
- USAGE= Gas usage in liter (1000 liter = 1 m³). This is a total counter.
So if your gas meter shows f.i. 145,332 m³ you should send 145332.
The USAGE is the total usage in liters from start, not f.i. the daily usage.
Note: Use this device together with P1 Electricity meter. Else use the general Counter, switched to type Gas which has more functionality.
Humidity
Device showing the humidity in percentage.
Location: Temperature tab
History report: Yes
Values
- PERCENTAGE = Percentage (can be > 100% but graphs only go to 100%)
- HUM_STAT = Humidity_status
Humidity_status can be one of:
- 0=Normal
- 1=Comfortable
- 2=Dry
- 3=Wet
Leaf Wetness
Device showing the leaf wetness.
Location: Utility tab
History report: Yes
Values
- VALUE = Leaf Wetness (integer)
Lux
Device showing the light illuminance in Lux
Location: Utility tab
History report: No
Values
- VALUE = value of luminosity in Lux (INTEGER/FLOAT)
Managed counter
Location: Utility tab.
History report: No
Values
- COUNTER = absolute counter energy (Wh, can be set to -1 if unknown or unused, in that case it won't show on dashboard or in logs)
- USAGE = energy usage in Watt-hours (Wh).
Managed counter will not transfer automatically every day data from device status to history log. It is up to an external script or plugin to insert data in history log database (useful to show non realtime consumption of energy provider that put energy information "in the cloud").
P1 Electricity smart meter
Device that shows the grid current electricity power usage and return delivery and the cumulative energy usage and delivery.
Based on the P1 Smart meters for grid monitoring. Do not use this device for solar panel monitoring.
Location: Utility tab.
History report: Yes
Type: P1 Smart Meter, Energy
Values
- USAGE1= total energy usage meter tariff 1 in Wh, This is an incrementing counter
- USAGE2= total energy usage meter tariff 2 in Wh, This is an incrementing counter
- RETURN1= total energy return meter tariff 1 in Wh, This is an incrementing counter
- RETURN2= total energy return meter tariff 2 in Wh, This is an incrementing counter
- CONS= actual usage power (Watt)
- PROD= actual return power (Watt)
USAGE and RETURN are counters (they should only count up).
For USAGE and RETURN supply the data in total Wh with no decimal point.
(So if your meter displays f.i. USAGE1= 523,66 KWh you need to send 523660)
Today values will be calculated by Domoticz.
See for more info about P1 meter also page Dutch DSMR smart meter with P1 port
Pressure
Device showing the pressure in Bar.
Location: Utility tab
History Report: No
Values
- BAR = Pressure in Bar
Percentage
Device showing the percentage value. Percentage could be > 100%
Location: Utility tab
History Report: No
Values
- PERCENTAGE = Percentage
Rain
Device showing the falling Rain values
Location: Weather tab
History Report: Yes
Values
- RAINRATE = amount of rain in last hour in [mm x 100]
- RAINCOUNTER = continues counter of fallen Rain in [mm]
Scale
Device showing the weight of a scale in kg
Location: Utility tab
History Report: No
Values
- WEIGHT = weight in kg
Soil Moisture
Device showing the Soil moisture
Location: Utility tab
History Report: No
Values
- MOISTURE = moisture content in cb 0-200 where:
00 - 09 = saturated, 10 - 19 = adequately wet, 20 - 59 = irrigation advice, 60 - 99 = irrigation, 100-200 = Dangerously dry,
Solar Radiation
Device showing the solar radiation in Watt/m2
Location: Weather tab
History Report: No
Values
- Radiation = radiation in Watt/m2
Sound Level
Device showing the sound level in dB
Location: Utility tab
History Report: No
Values
- Sound level = sound level in dB
Temperature
Temperature device showing Temperature.
Location: Temperature tab
Values:
- TEMP = Temperature
Temperature/humidity
Combined Temperature and Humidity device.
Location: Temperature: Temperature tab
Humidity: Utility tab
Values:
- TEMP = Temperature
- HUM = Humidity (0-100 %)
- HUM_STAT = Humidity status
HUM_STAT can be one of:
- 0=Normal
- 1=Comfortable
- 2=Dry
- 3=Wet
Temperature/humidity/barometer
A combined Temp+Humidity+Barometer device
Location: Temperature: Temperature tab
Humidity: Utility tab
Barometer: Weather tab
History Report: Yes
Values
- TEMP = Temperature
- HUM = Humidity
- HUM_STAT = Humidity status
- BAR = Barometric pressure
- BAR_FOR = Barometer forecast
Barometer forecast can be one of:
0 = Stable
1 = Sunny
2 = Cloudy
3 = Unstable
4 = Thunderstorm
5 = Unknown
6 = Cloudy/Rain
Temperature/barometer
A combined Temp+Barometer device
Location: Temperature: Temperature tab
Barometer: Weather tab
Values
- TEMP = Temperature
- BAR = Barometric pressure
- BAR_FOR = Barometer forecast
Barometer forecast can be one of:
0 = Stable
1 = Sunny
2 = Cloudy
3 = Unstable
4 = Thunderstorm
5 = Unknown
6 = Cloudy/Rain
Text sensor
Device showing text values.
Values
- TEXT = Text you want to display, can be multiple lines when adding
\r\nto the string.
Usage Electricity
Device that shows the current power usage in Watt.
Note: As this is only showing current power usage it is better to use the Electricity (instant and counter) sensor as this can calculate the cumulative energy in Watt-hours (Wh) and has a history report function.
Location: Utility tab.
History report: No
Values
- POWER = current power
UV
Device showing the solar UV values
Location:
Values
- UV = Float (example: 2.1) with current UV reading
- TEMP = temperature (only for UV subtype TFA (3), else specify 0)
Don't loose the ";0" at the end - without it database may corrupt.
If no temp is in use, specify 0 as temperature.
Visibility
Values
- VISIBILITY = in KM
Voltage
Device showing the Voltage values.
Location: Utility tab
History report: No
Values
- VALUE = value of voltage sensor in Volts
Waterflow
Device showing the waterflow (or any other liquid or gas) in liters/minute.
Location: Utility tab
History report: No
Values
- VALUE = value of waterflow in liters/minute.
Wind
Device showing the wind values (bearing, speed, gust)
Location: Weather tab
Values
- WB = Wind bearing (0-359)
- WD = Wind direction (S, SW, NNW, etc.)
- WS = 10 * Wind speed [m/s]
- WG = 10 * Gust [m/s]
- 22 = Temperature
- 24 = Temperature Windchill
Wind+Temp+Chill
Device showing the wind values (bearing, speed, gust), temperature and the windchill temperature
Location: Wind: Weather tab
Temp+Chill:Temperature Tab
Values
- WB = Wind bearing (0-359)
- WD = Wind direction (S, SW, NNW, etc.)
- WS = 10 * Wind speed [m/s]
- WG = 10 * Gust [m/s]
- 22 = Temperature
- 24 = Temperature Windchill


