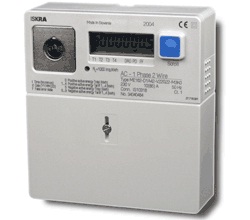
Dutch DSMR smart meter with P1 port
Smart Meter
Smart Meters allow grid operators and energy suppliers to remotely access your energy usage data. These meters primarily measure electricity usage, but they also allow up to four peripheral meters to be connected to them to include usage data from e.g. gas, city block heating, water. In some cases suppliers will allow their customers to view their own data through a web portal and at least in one case the supplier feeds back this information through a "free" device that replaces your room thermostat (Toon).
What makes these meters attractive is that they also report their data on a serial port that we can connect to and that this data contains the actual meter values. This means that you never need to adjust counter values because you missed a few pulses.
Domoticz
Smart Meter support has been part of Domoticz from the very beginning.
Setup
Requirements
Of course they had to make things difficult, so the serial port on the Smart Meter is a RJ-11 ("phone connector") port and the signal is inverted. To connect the Smart Meter to Domoticz you therefore need a special serial to USB converter cable. Several ready made cables are available [1], but you can also create your own. Other options include using e.g. an Arduino board,ESP8266 or c.h.i.p. with ser2net to push the data from the Smart Meter onto the network, which gives you the advantage that your Domoticz server does not have to be close to the Smart Meter.
Adding the Smart Meter to Domoticz
- For direct connection via USB:
Use the Domoticz 'Set-up'->'Hardware' menu and choose the 'P1 Smart Meter USB' device.
The baud rate is either 9600 or 115200, where 9600 is reserved for the first generation meters. Therefore, if you receive a new Smart Meter you should select 115200 here. You may also find a hint which to select on the meter itself: newer meters will typically have the protocol version they use stamped on the front, so if you see something like DSMR 4.x or ESMR 5.x printed there you need baud rate 115200. If you don't see either, select 9600. Of course you can also simply choose either one and if you don't see any data coming in select the other one (see also section "No data coming in after installation of new Smart Meter" below) .
- For connection via ethernet:
Setup ser2net (see wiki page SharingSerialDevices) with the the baudrate found like the USB setup.
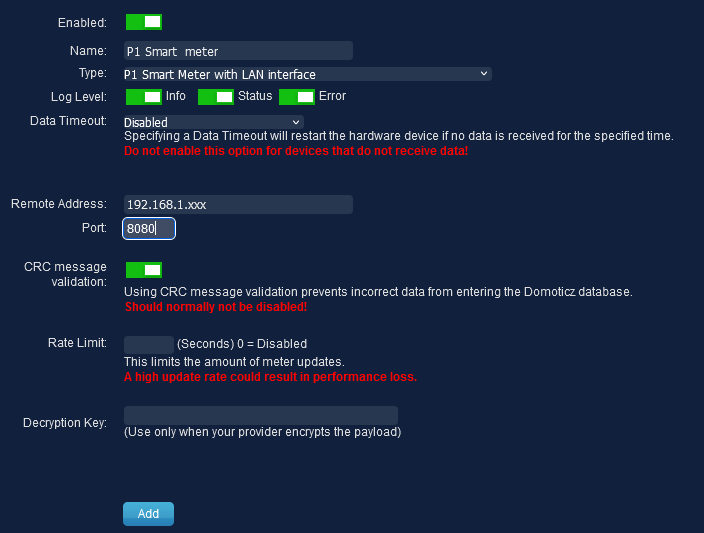
Use the Domoticz 'Set-up'->'Hardware' menu and choose the 'P1 Smart Meter with LAN interface' device.
Fill in the ip number and port ser2net host. and press "Add" now you have the same meters as with USB.
CRC message validation: Prevents reading corrupt telegram messages.
Rate Limit: The wait time between reading the smart meter.
Advised it to set to minimal 10 seconds, Normally 30 or 60 seconds should be sufficient. Lower values could lead to performance loss of your Domoticz system!
Decryption Key: In some countrie (eg Luxembourg and Austria) the data is encrypted. You have to contact your energy supplier to request a decryption key. Fill this in this field.
P1 meter devices created in Domoticz
Smart meters with the protocol DSMR 4. 2 (See: https://www.netbeheernederland.nl/_upload/Files/Slimme_meter_15_32ffe3cc38.pdf) and ESMR 5.0 (See: https://www.netbeheernederland.nl/_upload/Files/Slimme_meter_15_a727fce1f1.pdf) do provide the following sensors in Domoticz:
- Total Electricity Usage (Current usage (W), Daily usage (kWh) and Total usage (kWh), the same for Return values (eg when having Solar panels connected).
- In the log graphs Usage and Delivery 1 and 2 are referring to the Night/Day tariffs T1 and T2
- Gas usage (Daily usage and Total usage (m3)) when gas meter is attached to the Smart meter
- Water usage (Daily usage and Total usage (m3)) when water meter is attached to the Smart meter (from 2022.2)
- Line Voltages for L1, L2 and L3, if you have a 3-phase kWh meter; in case you have a 1-phase kWh meter, you have only L1
- Power Consumption for L1, L2 and L3, if you have a 3-phase kWh meter. In case you have a 1-phase kWh meter, you have only L1 (only for DSMR 5.0)
- Power Delivery for L1, L2 and L3, if you have a 3-phase kWh meter. In case you have a 1-phase kWh meter, you have only L1 (only for DSMR 5.0)
- Current (Ampere) Consumption for L1, L2 and L3, if you have a 3-phase kWh meter; in case you have a 1-phase kWh meter, you have only L1 (only for DSMR 5.0)
- Current (Ampere) Delivery for L1, L2 and L3, if you have a 3-phase kWh meter; in case you have a 1-phase kWh meter, you have only L1 (only for DSMR 5.0)
- Actual Total Usage: Usage L1+L2+L3
- Actual Total Delivery: Delivery L1+L2+L3
- Calculated Usage Energy (kWh) L1, L2, L3
- Calculated Delivery Energy (kWh) L1, L2, L3
If you have a Smart meter, with the protocol DSMR 4.0 or earlier (See: http://files.domoticaforum.eu/uploads/Smartmetering/DSMR%20v4.0%20final%20P1.pdf), you do not have any information about each phase (L1,L2 and L3).
Additional Settings
In menu Setup -> Settings Tab Meter / Counter Dividers you can set the for example the Energy T1 and T2 and Gas tariffs, if you want to se decimals in the P1 meter values etc.
For Netherlands, T1 is the night/weekend (low) rate, T2 is the day (high) rate.
Real time Cost calculation
For real time Energy cost calculations enable the calculations in menu Setup -> Settings, tab Meter/Counters, section (Dynamic) Price calculation and select the P1 Smart meter device for P1/Grid calculations.
See also wiki page Setup Settings
When real time cost calculation is enabled the real time costs will be shown in the graphs as an extra yellow line graph feature. Also in the page report it will be used.
Log and Reports
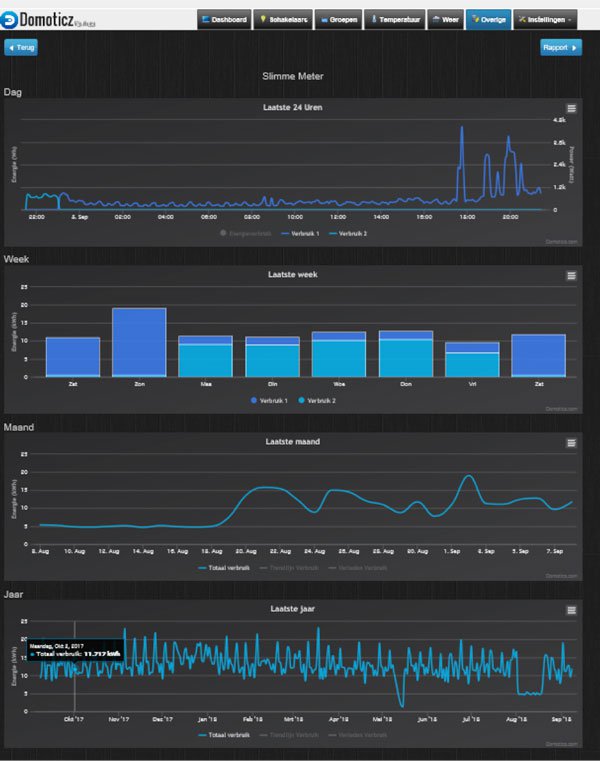
After clicking on the Log button you see the log page
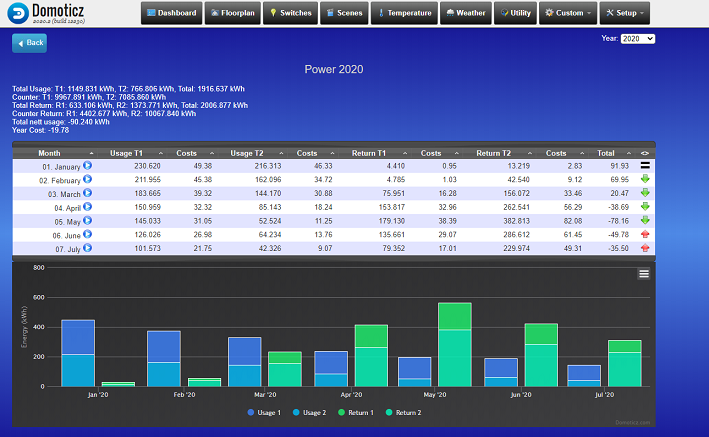
After clicking on the log button showing all the graphs (day/week/year and compare) you can go to the report page (button Report) to see year, and month report from the past.
Example report for one year in the past (2020):
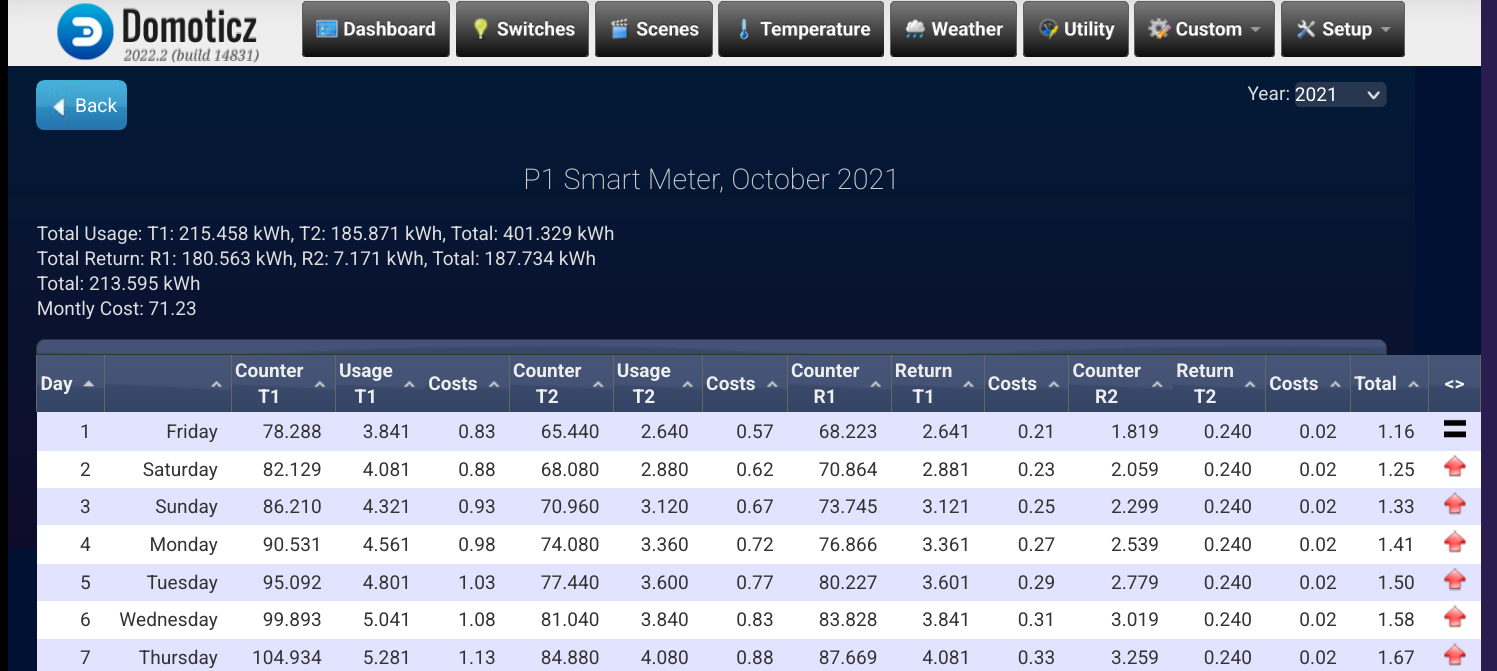
Example day report of a month in the past
Belgium DSMR
Also Belgium smart meters are supported including the Gas meter values.
Belgium has a slightly different implementation of the DSMR and although Line Amperage are reported in mA instead of A the are not yet implemented in Domoticz.
For Belgium normally, but dependent on supplier, T1 is the day (high) rate, T2 is the night/weekend (low) rate. So switched from the Netherlands.
Luxemburg DSMR
In Luxembourg the smart meter (smarty) is compliant with the "Dutch Smart Meter Requirements v5.0.2 Final P1" In deviation to DSMR P1, an encryption layer is added over the P1 protocol. This is supported by Domoticz.
Not so Smart Meters
Known issues
No data coming in after installation of new Smart Meter
First thing to look at is the baud rate. Is that set to the correct value? If your old meter worked with 9600 baud there is also a chance that your cable might be incorrect. The DIY manual states that you should install a 1K resistor between RXD and VCC(TX) and this appears to work well with the older meters, but the new meters require a fairly higher value for this resistor: 10K
To check that Domoticz is receiving valid information use (replace USB device and speed if needed):
sudo service domoticz stop
sudo cu -l /dev/ttyUSB0 -s 115200
sudo service domoticz start
Gas meter not reporting any data
When a gas meter is paired with the Smart Meter it gets assigned one of the four available channels. Normally Domoticz will be able to tune in to the correct channel, but sometimes technicians leave the old gas meter registered in the Smart Meter and Domoticz ends up selecting the dead gas meter for input. To fix this you can use a hidden feature in the P1 Smart Meter class that allows you to override the channel auto select mechanism. Go to the Domoticz 'Set-up'->'More Options'->'User Variables' menu and create a new 'integer' value named 'P1GasMeterChannel'. Allowed values are 0 which is the default and enables auto select, or 1 to 4 for either of the four possible channels. To activate the change you must restart the hardware class. For this, go to the Domoticz 'Set-up'->'Hardware' menu, select your P1 Smart Meter hardware and click on 'Update'. You may check the log to verify that the override is now active. Also wait for a few minutes to get Gas data being updated as it is not sent as frequently as electricity data.

