EnOcean
EnOcean
Prerequisites
At the moment the EnOcean Serial Protocol Version 2 (ESP2) and version 3 (ESP3) are supported.
For ESP2 you need an EnOcean TCM1x0/2x0 USB stick or transceiver module, or similar.
For ESP3 you need an EnOcean USB3x0/4x0J/5x0U USB stick, a TCM3x0/3x0U transceiver module, or similar.
ESP3 is the most up to date version and shall be preferred, as it is currently being supported and support shall be progressively added for new EnOcean devices.
Please consult PersistentUSBDevices for help installing your EnOceanUSB stick properly on Linux systems.
Supported EnOcean Equipment Profiles (EEP's)
Domotics supports EnOcean Equipment Profiles (EEP's) in two different ways :
- receiving and processing telegrams sent by EnOcean nodes to update the corresponding status data within Domoticz,
- sending telegrams to EnOcean nodes to configure them, query them or ask them to perform actions such as switching/dimming/....
It is necessary to teach-in (or associates, or learn) an EnOcean Node within Domoticz before any interaction can occur in either direction (receiving status or sending commands).
As not all EnOcean EEP support direct commands, Domotics also implements virtual switches/dimmers that can be used to send commands to EnOcean nodes. It is necessary to associate a virtual switche/dimmer to an EnOcean node before any interaction can occur.
Please note that not all EnOcean Eequiplments Profiles (EEP's) are supported (there are lot's of types with their own special rules).
If this is the case for your equipment, please let us know, and we will try to include them.
Below are listed EnOcean Equipment Profiles (EEP's) supported by Domoticz 2022.1 stable release.
Supported ESP3 EEP's
ESP3 EEP's supported for receiving status updates from:
A5-02-01..30, Temperature sensor
A5-04-01..04, Temperature and Humidity Sensor
A5-06-01, Light Sensor
A5-07-01, Occupancy sensor with optional Supply voltage monitor
A5-07-02, Occupancy sensor with Supply voltage monitor
A5-07-03, Occupancy sensor with Supply voltage monitor and 10-bit illumination measurement
A5-09-04, CO2 Gas Sensor with Temp and Humidity
A5-10-01..OD, Room Operating Panel
A5-12-00, Automated Meter Reading, Counter
A5-12-01, Automated Meter Reading, Electricity
A5-12-02, Automated Meter Reading, Gas
A5-12-03, Automated Meter Reading, Water
D2-01-00..17, Electronic Switches and Dimmers with Local Control, including D2-01-0C, Slot-in module, Pilotwire
D2-03-0A, Push Button, Single Button
D2-05-00, Blinds Control for Position and Angle
D2-14-30, Sensor for Smoke, Air quality, Hygrothermal comfort, Temperature and Humidity
D5-00-01, Single Input Contact
F6-01-01, Switch Buttons, Push button
F6-02-01/02, Rocker switch, 2 Rocker
F6-05-00, Wind speed threshold detector
F6-05-01, Liquid Leakage Sensor (mechanic harvester)
F6-05-02, Smoke detector
ESP3 EEP's supported for sending commands to:
D2-01-00..17, Electronic Switches and Dimmers with Local Control, including D2-01-0C, Slot-in module, Pilotwire
D2-05-00, Blinds Control for Position and Angle
NB. Sending direct commands to those nodes only works when the teach-in has been performed with 2022.1 release (or beta version after August 12, 2021), because of a new implementation of bi-directional UTE teach-in. If this is not working for your domoticz system, you will have to remove the node, and perform a new teach-in.
The new EnOcean configuration screen, available in current beta, can help you to do so. Check it's documentation !
Supported ESP3 virtual EEP's, for sending commands:
Virtual switches/dimmers emulate RPS F6-02-01/02, Rocker switch, 2 Rocker
Supported ESP2 EEP's
ESP2 EEP's supported for receiving status updates from:
A5-02-01..30, Temperature sensor
A5-04-01..04, Temperature and Humidity Sensor
A5-06-01, Light Sensor
A5-07-01, Occupancy sensor with optional Supply voltage monitor
A5-07-02, Occupancy sensor with Supply voltage monitor
A5-07-03, Occupancy sensor with Supply voltage monitor and 10-bit illumination measurement
A5-09-04, CO2 Gas Sensor with Temp and Humidity
A5-10-01..OD, Room Operating Panel
A5-12-00, Automated Meter Reading, Counter
A5-12-01, Automated Meter Reading, Electricity
A5-12-02, Automated Meter Reading, Gas
A5-12-03, Automated Meter Reading, Water
F6-02-01/02, Rocker switch, 2 Rocker
Supported ESP2 virtual EEP's, for sending commands:
ESP2 virtual switches emulate F6-02-01/02, Rocker switch, 2 Rocker
ESP2 virtual dimmers emulate A5-38-08, Central Command, Gateway
EnOcean hardware setup screen
A new EnOcean Setup screen is available since 2022.2 release.
To access it, go to the Hardware screen, and press the Setup button of the EnOcean hardware controller :
![]()
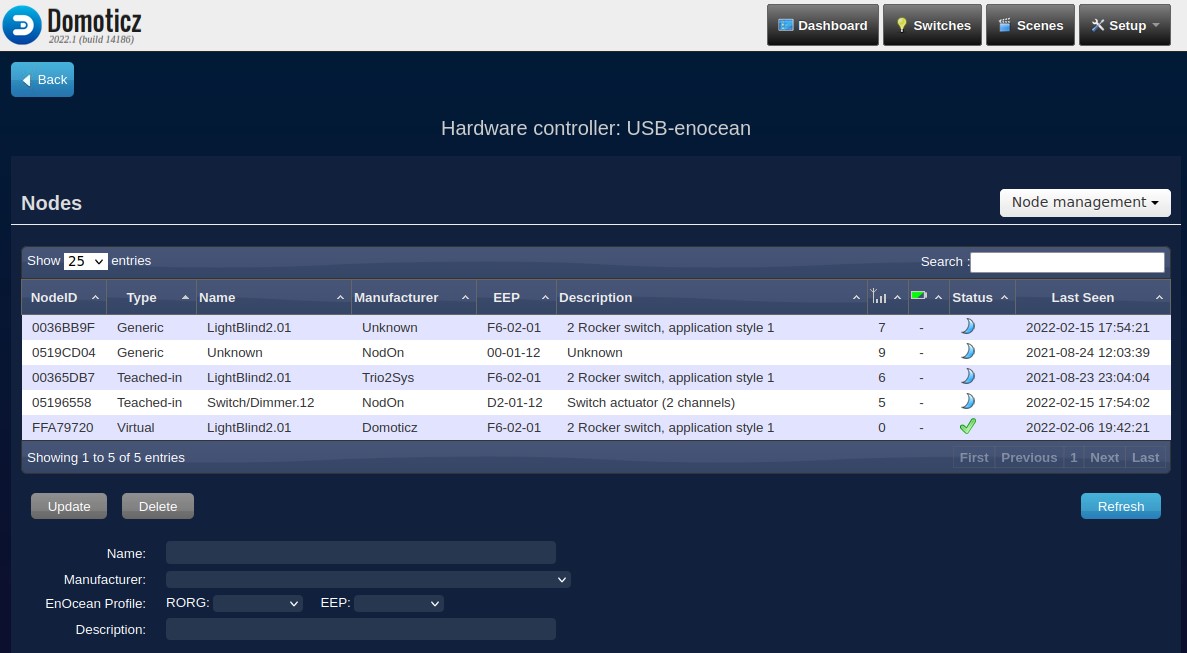
Then, you will reach the following screen :
From here, you can :
- Visualise all nodes attached to an EnOcean hardware controller,
- Select a node to update it's data : Name, Manufacturer, EEP and Description,
- Select a node to delete it,
- Teach-in new nodes,
- Soft reset the controller.
Visualise all nodes attached to an EnOcean hardware controller
NodeID : unique EnOcean ID, identifying the node
Type :
Teached-in : a node fully learned and attached to the hardware controller
Generic : a node created with a default EEP, because not provided during teach-in process for 1BS (D5), RPS (F9) and some 4BS (A5) profiles. Also used when the RORG is not known, after upgrading from a Domotics version prior to August 2021. In that case, the node can be manually updated to assign the appropriate EEP or add missing RORG.
Virtual : a virtual switch created from Domoticz to enable sending commands to real nodes
Name : node name, initialized by default to a value corresponding to the EEP, can later be manually changed
Manufacturer : node manufacturer, initialized by default if provided during teach-in, can later be manually changed
EEP : node EnOcean Equipment Profile, generic or provided during teach-in, can later be manually changed (please, be carefull when doing so : a node with wrong EEP shall work properly !)
Description : node description, initialized by default to a value corresponding to the EEP, can later be manually changed
Radio status : quality of the radio signal for telegrams received from the node
Battery status : reports node power/battery status, when supported
Wake status : indicates if the node is awake, sleeping or not reacheable, when supported
Last seen : date/time the node sent data to the system
NB. You can use the Refresh button at any time to reload nodes data.
Update nodes data : Name, Manufacturer, EEP and Description
To update a node data, you first have to select it.

You can then edit node Name, Manufacturer, EnOcean Profile and Description.

When done, press Update button and confirm you want to update in the popup dialog.

Delete nodes
Please note that the node deletion cannot be reverted : the node, as well as all it's attached devices, shall be permanently deleted.
To delete a node, you first have to select it, and then to press Delete button.

You will be asked in a popup dialog to confirm the deletion.

Teach-in new nodes
Use the Nodes management menu, selecting Include node.

The system shall allow teaching-in new EnOcean nodes during 1 minute.

If a new node has been teached-in during that period, it's characteristics will be presented and it will then be added to the table.
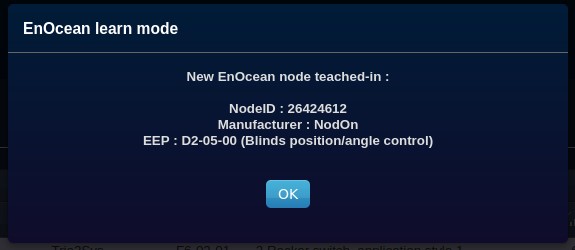
Please note that devices attached to the node may either appear in the Devices screen right after the teach-in process or later, upon first use. This is depending on the node and it's EEP.
In case no new node has been teached-in after a moment, a timeout occurs and the system exits learn mode.
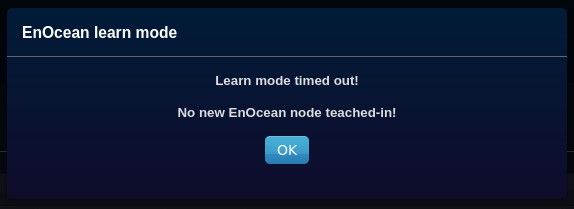
Soft reset the controller
Use the Nodes management menu, selecting Soft reset controller.

EnOcean nodes teach-in
Before Domoticz is accepting any new supported EnOcean node and can interact with it, you will have to perform a teach-in to let the software know about it's existence and type (i.e. EEP, name, configuration, ...).
To perform teach-in :
- Firstly, it is necessary to allow Domotics accepting new hardware devices. This can be done either from the 'Light/Switches' tab by pressing 'Learn Light/Switch' button, or from 'Settings tab', to allow it permanently or during 5 minutes. This can also be done from the new EnOcean hardware setup screen, if you are using a recent Domoticz version.
- Then, you have to follow the teach-in procedure described in the EnOcean node user manual : press node learn switch, press node switch button 3 times, etc...
Examples of VLD nodes teach-in (EEP D2-xx-xx)
To include a NoDon SIN-2-2-01, 2 channels on/off switches in-wall module, EEP D2-01-12, first allow Domoticz accepting new devices, and then do 3 consecutive presses (<2 seconds) on the module button. The module LED blinks green to acknowledge teach-in.
The log displays the following messages to indicate the node and associated devices have been created..

To include a NoDon SIN-2-RS-01, roller shutter relay switch module, EEP D2-05-00, first allow Domoticz accepting new devices, and then do 3 consecutive presses (<2 seconds) on the module button. The module LED blinks green to acknowledge teach-in.
The log displays the following messages to indicate the node and associated devices have been created.

Example of 4BS node teach-in (EEP D5-xx-xx)
To include a Trio2Sys 02Line Comfort ref.10020032, opening contact sensor, EEP D5-00-01, first allow Domoticz accepting new devices, and then press on the module button.
The log displays the following messages to indicate the node and associated devices have been created.

Example of RPS node teach-in (EEP F6-xx-xx)
Please note that several EnOcean nodes with RPS EEP's (F6-xx-xx) have have no specific teach-in procedure. To include them, you need to use use the device 3 times in less than 2 seconds (push button, switch on/off, dimm +/-, insert/remove keycard, move handle, activate sensor...).

To include an EnOcean PTM 21x based 2 rocker switches, EEP F6-02-01, first allow Domoticz accepting new devices, and then do 3 consecutive presses (<2 seconds) on one of the buttons.
The log displays the following messages to indicate the node and associated devices have been created.
Please note that it might be necessary to press successively all the buttons to create all the associated devices.
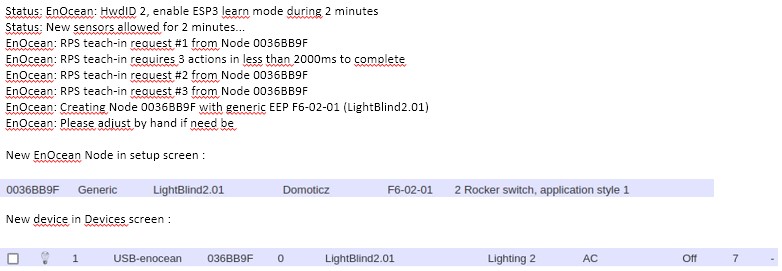
Virtual switches and Dimmers
As not all EnOcean EEP support direct commands, Domotics implements virtual switches and dimmers, emulating normal switches/dimmers, that can be used to send commands to EnOcean nodes.
It is necessary to associate a virtual switch/dimmer to an EnOcean node before any interaction can occur.
Put the node into 'Learn' mode according to it's user manual.
Activate the virtual switch/dimmer from the Devives or Switches screen, clicking on the lamp icon or using the slider for a dimmer.
Virtual Switches
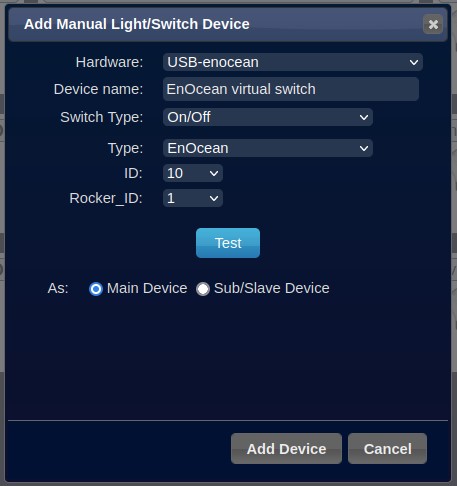
Virtual switches (emulating normal switches) can be created in the system by going to the 'Light/Switches' tab, and pressing the 'Manual/Light' switch button.
For these devices you have to :
- select the EnOcean hardware controller,
- enter a Device name,
- make sure the SwitchType is set to On/Off and Type is set to EnOcean.
- choose an ID (1-127) and the Rocker_ID (1: Switch A / 2: Switch B).
Optional (can be done later) : to associate the virtual switch to an EnOcean node, set the node into 'Learn' mode according to it's user manual, and press the 'test' button.
Then press the 'Add device' button to create the virtual switch (which will then appear in both EnOcean setup and Device screens).
Virtual Dimmers
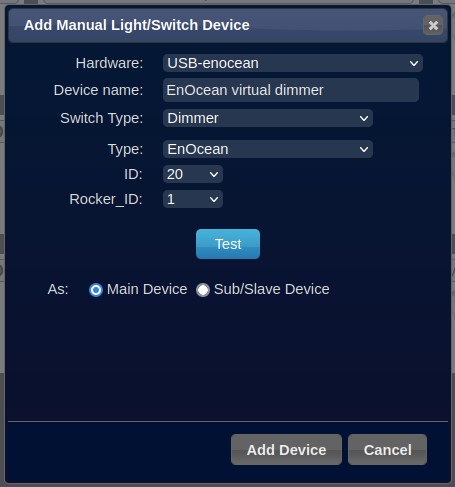
Virtual dimmer actions (emulating normal dimmer switches) can be included in the system by going to the 'Light/Switches' tab, and pressing the 'Manual/Light' switch button.
For these devices you have to :
- select the EnOcean hardware controller,
- enter a Device name,
- make sure the SwitchType is set to Dimmer and Type is set to EnOcean.
- choose an ID (1-127) and the Rocker_ID (1: Switch A / 2: Switch B).
Optional (can be done later) : to associate the virtual dimmer to an EnOcean node, set the node into 'Learn' mode according to it's user manual, and press the 'test' button.
Then press the 'Add device' button to create the virtual dimmer (which will then appear in both EnOcean setup and Device screens).
Slave Devices
As you probably also use real hardware to control the On/Off/Dimmers, you will notice that these devices are also in the domoticz system.
You may need to make these devices 'Slave' devices for the Domoticz Lights/Switches (See Manual) Wiki : Managing Devices#Sub.2FSlave devices.
This way when you turn On/Off a light, the status is also updated for the Domoticz Lights/Switches.
