YeeLight
How to Connect Your YeeLight to Domoticz
Using YeeLight App to Enable Developer Mode
Before you are able to connect your YeeLight to Domoticz, you need to enable developer mode on your YeeLight. Enabling developer mode allows for your YeeLight to connect to third parties like Domoticz.
1. Download YeeLight app onto an iOS or Android device. You will need to create an account and choose your geographical location.

2. Navigate to the Device tab on the bottom right portion of the screen and click Add Device.
3. Then, you will have to choose the type of YeeLight you have and want to connect.
4. The app will then prompt you to reset the device by turning the light on and off 5 times in a row (turning on for 2 seconds, turning off for 2 seconds). The bulb should start flashing different colors then hold a solid color signifying it has been reset.
5. The next step is to connect to the Wifi network that you want the YeeLight to be connected to.
6. The YeeLight should then be automatically connected to the app. Then, select the light as the device to add and click next step.
7. For the next step, the app will attempt to connect the YeeLight to your home Wifi network, so it is pivotal that you keep the YeeLight close to your phone and the router while it attempts to connect.
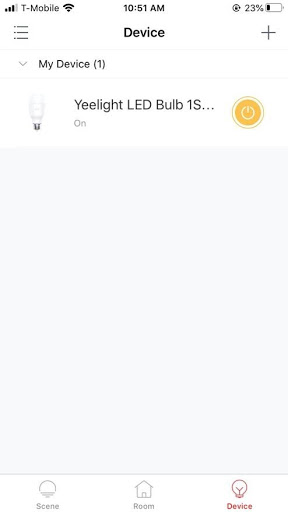
8. After it is connected, the YeeLight will be visible under the Device tab on the YeeLight App. Click on the YeeLight device that you just added.

9. After clicking on your recently added device, there is three icons on the bottom of the screen. Click the triangle with a line icon on the bottom right.
10. This will reveal additional icons. Choose the LAN Control lightning bolt icon.
11. Then, use the toggle to enable LAN Control which enables your YeeLight to be connected to Domoticz.
Connecting YeeLight to Domoticz Interface
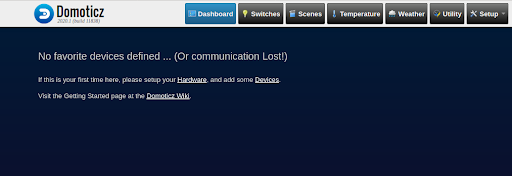
First, you need to get the Domoticz interface wherever you have it running. The Domoticz interface is shown below:

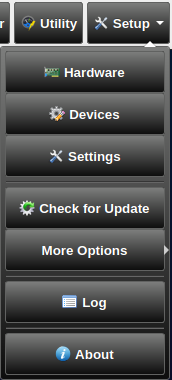
1. To begin connecting your YeeLight to Domoticz, navigate to the Setup tab showing the dropdown menu and select hardware.

2. In the Hardware section, it will ask you to name the hardware you are intending to add, select the type of hardware (YeeLight LED) from the dropdown menu, and press add.
3. Navigate Setup Devices and check to see if the YeeLight you just added has been detected and is visible under devices. If the recently added YeeLight is visible in the Devices tab, proceed to Step 6.
4. If the recently added hardware is not visible under devices, return to Setup 🡪 Hardware. In the section that lists the hardware added, find the entry that was added in Step 2 and press the “Add Light” button next to that entry.
5. This will bring up a box asking you to name your device, enter the YeeLight’s IP address, and the light type from the dropdown menu. Now your YeeLight will be visible in the Devices tab.
Finding the IP address of your YeeLight
a) The IP address of your YeeLight can be found in the YeeLight app. Under the Devices tab of the YeeLight app, choose the YeeLight that you wish to know the IP address of.
Click the icon in the top right corner, which will open the Settings.
Then, there is an option to open “Device Info” which will reveal the IP address of your YeeLight.
    b) There is also some benefit to having your YeeLight on a public IP address. This would allow for multiple people to connect and access the same YeeLight, regardless of geographical location, as long as they know the public IP address of the router that the YeeLight is connected to. This scenario would be particularly useful for developers who want to work and contribute to Domoticz but do not want to have to buy all the hardware. The link below explains the steps to finding the public IP address of your router:
https://nordvpn.com/blog/find-router-ip-address/
6. Under the Devices tab, you can find the YeeLight that is now connected to Domoticz. The entry showing the YeeLight has a green circle with an arrow in it and by clicking it, it will create a switch for the YeeLight that you just added.
7. The switch can be found under the Switches Tab, and this switch allows you to turn the light on and off and change the color of your newly connected YeeLight.