Homekit Siri
This wiki page describes the installation steps required to install Homebridge & Systemd (Raspbian, Ubuntu, Debian) with Siri support. For Docker or Synology DSM install click here. This enables you to talk to your apple iPhone or iPad to control your domoticz installation.
To manage Homebridge(Homekit) go to for example, http://192.168.1.20:8581. From here you can install, remove and update plugins, modify the Homebridge config.json and restart Homebridge.
Update your system
Make sure your system is up-to-date:
 sudo apt-get update
 sudo apt-get upgrade
Install Homebridge & Systemd
Step 1: Install Node.js and Homebridge
Install the LTS version of Node.js from the official repository, as well as additional dependencies:
curl -sL https://deb.nodesource.com/setup_12.x | sudo bash -
sudo apt-get install -y nodejs gcc g++ make python
Test if node is working. This should display the version number of the installed node.js
node -v
 Raspberry Pi 1 and Zero Users, click here for alternative Node.js installation instructions.
The installation of Node.js on arm32v6 devices such as the Raspberry Pi 1 and Raspberry Pi Zero is not supported by the official repository using the steps above. Instead use the following commands to install Node.js.
update repos and install deps
 sudo apt-get update
 sudo apt-get install -y gcc g++ make python
install node and npm
curl -Lsf "https://nodejs.org/dist/v10.16.3/node-v10.16.3-linux-armv6l.tar.gz" | tar xzf - -C /usr/local --strip-components=1 --no-same-owner
test node is working
node -v
Now install Homebridge and Homebridge Config UI X:
sudo npm install -g --unsafe-perm homebridge@latest homebridge-config-ui-x@latest
To setup Homebridge as a service that will start on boot you can use the provided hb-service command:
sudo hb-service install --user homebridge
This command will do everything that is required to setup Homebridge and the Homebridge UI as a service on your system, it will create the homebridge user if it does not already exist, and create the default Homebridge config.json under /var/lib/homebridge if it does not already exist.
When setting up Homebridge as a service using this command, the UI will stay online even if Homebridge is crashing due to a bad plugin or configuration error.
Step 2: Manage and Configure Homebridge
To manage Homebridge go to http://<ip of server>:8581 in your browser. For example, http://192.168.1.20:8581. From here you can install, remove and update plugins, modify the Homebridge config.json and restart Homebridge.
The default username is admin with password admin. Remember you will need to restart Homebridge to apply any changes you make to the config.json.
Step 3: Adding Homebridge to iOS
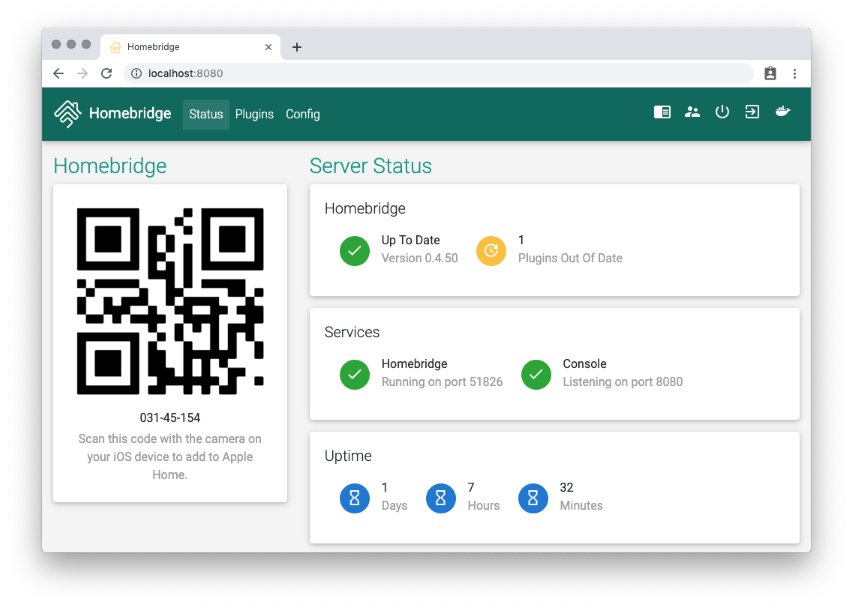
Use the Home app (or most other HomeKit apps), you should now be able to add the single accessory "Homebridge", assuming that you're still running Homebridge and you're on the same Wifi network. When you attempt to add Homebridge, scan the QR code in Homebridge Status Screen or add with PIN code. Adding this accessory will automatically add all accessories and platforms defined in config.
Troubleshooting
The Homebridge logs can be viewed using the web interface, but if cant open config ui or you need to view them via the terminal run:
sudo hb-service logs
Start, stop and restart service:
 sudo hb-service start
 sudo hb-service stop
 sudo hb-service restart
If you get this error in log: Error: Cannot add a bridged Accessory with the same UUID as another bridged Accessory:. Try delete cached accessories folder.
rm -r /var/lib/homebridge/accessories
Add Homebridge-Edomoticz plugin
Go to http://<ip of server>:8581 in your browser. For example, http://192.168.1.20:8581.
- Click on plugins
- Search for edomoticz
- Click Install in Homebridge Edomoticz container
- Click on Config
- Edit config to match your settings:
Note : you have to provide userid/password in the config.json file, even when you exclude local addresses from the need of authentication. To provide userid and password in config.json, change the server rule to:
"server": "username:[email protected]",
{
    "bridge": {
        "name": "Homebridge",
        "username": "CB:22:3D:E2:CE:31",
        "port": 51826,
        "pin": "031-45-154"
    },
    "accessories": [],
    "platforms": [
        {
            "name": "Config",
            "port": 8581,
            "auth": "form",
            "theme": "teal",
            "restart": "sudo -n systemctl restart homebridge",
            "tempUnits": "c",
            "sudo": true,
            "log": {
                "method": "systemd"
            },
            "platform": "config"
        },
        {
            "platform": "eDomoticz",
            "name": "eDomoticz",
            "server": "127.0.0.1",
            "port": "8080",
            "ssl": false,
            "roomid": 2,
            "mqtt": true,
            "excludedDevices": []
        }
    ]
}
- Click Save then Restart Homebridge
For more additional settings or help visit eDomoticz or forum thread
