How to set up a virtual machine to run Domoticz
Virtual Machine Creation
- Download a virtual machine program to create tour virtual machine. VMware Workstation Pro can be downloaded here: https://www.vmware.com/products/workstation-pro/workstation-pro-evaluation.html
- Install VMware Workstation Pro.
- After installation is complete, open VMware Workstation Pro and choose the “Create a New Virtual Machine” option.
- Then, choose the “Typical (recommended)” configuration type and hit “Next.”
- The next step is to choose a guest operating system for your virtual machine and a version. For running Domoticz, you should choose a Linux operating system with a Ubuntu version.
- The next step will ask you to name your virtual machine and choose a location to store your virtual machine.
- The next decision is to choose the disk capacity of your virtual machine. The maximum disk size in GB should be set to 32GB and choose the split virtual disk into multiple files.
- The final step is to review the creation of your VM and in this step, there is an option to “Customize Hardware” which should be chosen.
The default settings of the hardware are shown below:
To successfully run Domoticz, you are going to want to change these settings so they match the configuration below:
Download Domoticz on VM
- On your virtual machine, open the terminal application.
- Then, type the following command in the terminal, which will copy all the files from Domoticz’s GitHub into a directory named “dev-domoticz”: git clone https://github.com/domoticz/domoticz.git dev-domoticz
- Next, you will need to get into the new directory you created (dev-domoticz), pull the most recent version of the code from Domoticz’s GitHub, and then start building the code. The commands you will need to do that are written below: cd dev-domoticz git pull cmake -DCMAKE_BUILD_TYPE=Release CMakeLists.txt -DUSE_OPENSSL_STATIC="NO" make
- Next, in order to run Domoticz on your VM, you should run the following commands: cd domoticz sudo ./domoticz
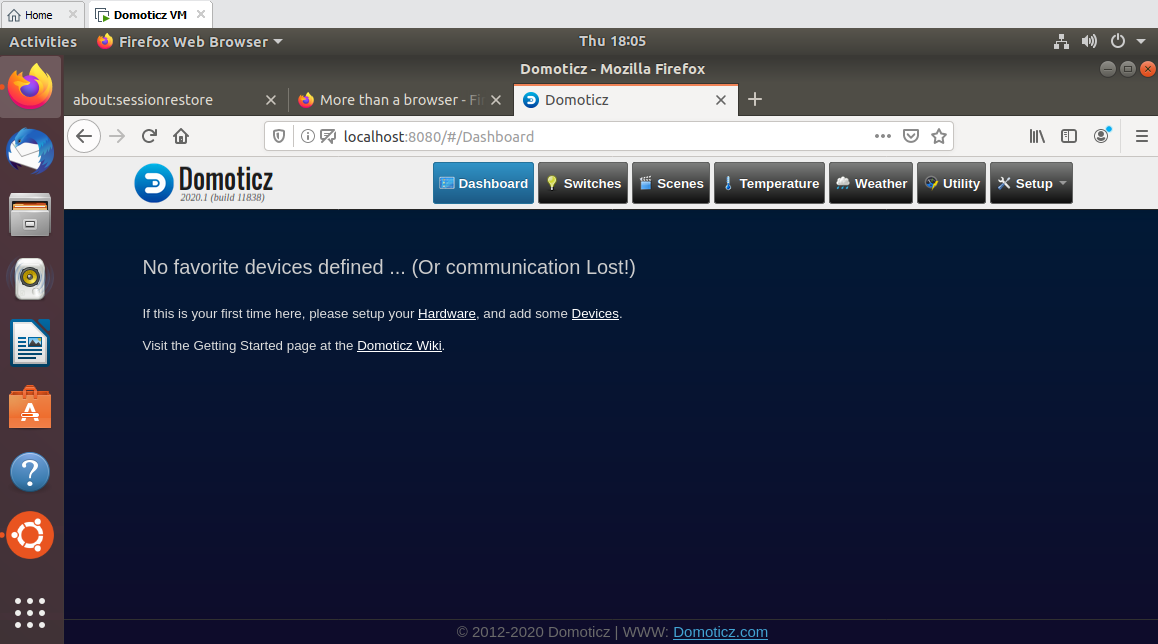
Then, in order to access the Domoticz interface via your virtual machine, you will need to open FireFox or another browser and go to: localhost:8080

Being able to access the Domoticz interface via the steps above ensures that you have Domoticz running correctly on your VM.
Download and Install Visual Studio Code
- Download and install Visual Studio Code on the VM you created.
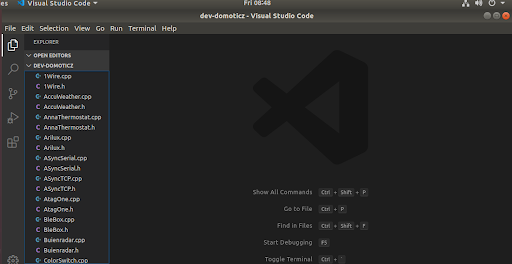
- Then, open Visual Studio Code. File --> Open Folder --> dev-domoticz --> OK(top right corner). Following these actions will download all the Domoticz files into Visual Studio Code, so that you are able to make code changes in Visual Studio Code. This is what Visual Studio Code should look like when your Domoticz files download.

Making Changes to Domoticz
- After making any code changes in the dev-domoticz files, you need to use Control + S to save any changes that you made to the code.
- Then, you need to go back to terminal and run the following commands to build the version of Domoticz complete with your code changes: cmake -DCMAKE_BUILD_TYPE=Release CMakeLists.txt -DUSE_OPENSSL_STATIC="NO" make
- Use the commands below to run Domoticz with your code changes cd domoticz sudo ./domoticz
Use a web browser on your VM to go to the address: localhost:8080 and use the interface to test your changes to see if they are correct